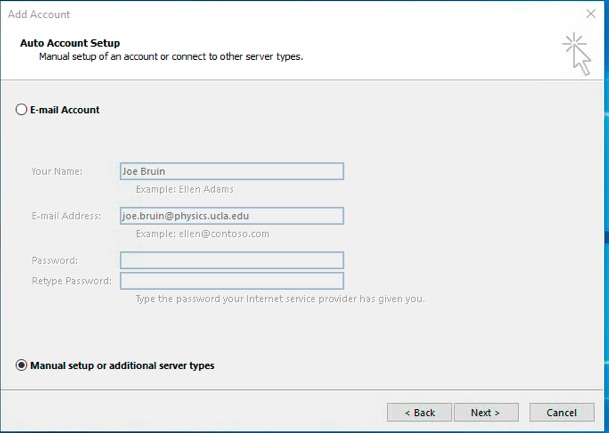
Fill in Your Name and E-mail Address and select •Manual setup or additional server types .
Click Next > .
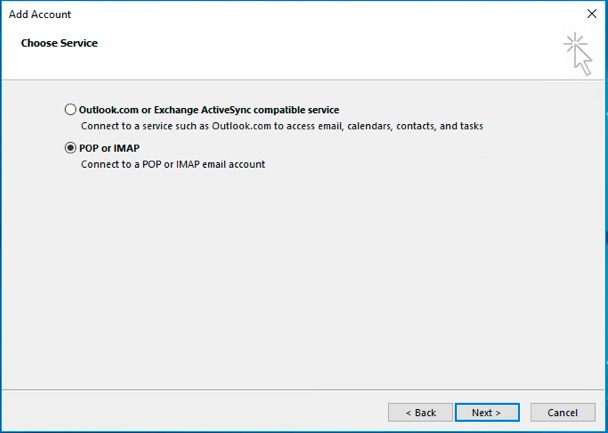
Select •POP or IMAP and click NEXT > .
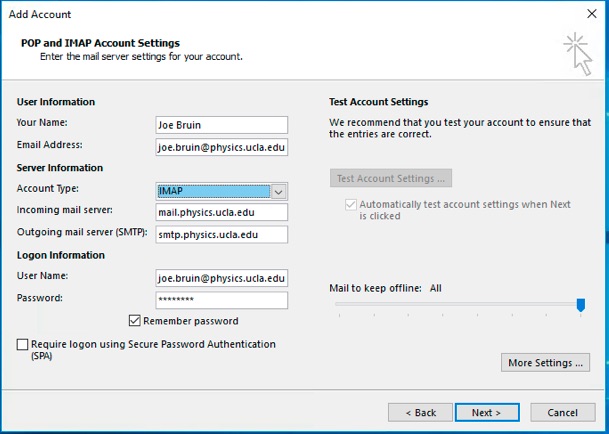
In the Account Type drop-down menu, select IMAP , fill in the server addresses appropriate to your e-mail domain, enter your Password and click More Settings ...
| Physics | Astronomy | |
| User Name | joe.bruin@physics.ucla.edu | joe.bruin@astro.ucla.edu |
| Incoming Mail Server (IMAP) | mail.physics.ucla.edu | mail.astro.ucla.edu |
| Outgoing Mail Server (SMTP) | smtp.physics.ucla.edu | smtp.astro.ucla.edu |
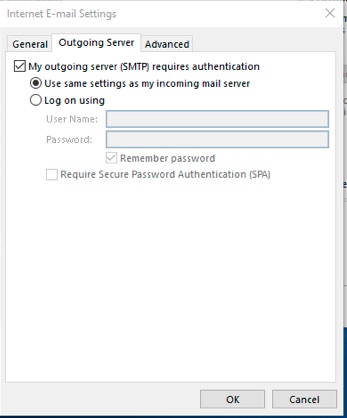
Select the Outgoing Server tab.
Select My outgoing server (SMTP) requires authentication and •Use the same settings as my incoming mail server . Then select the Advanced tab.
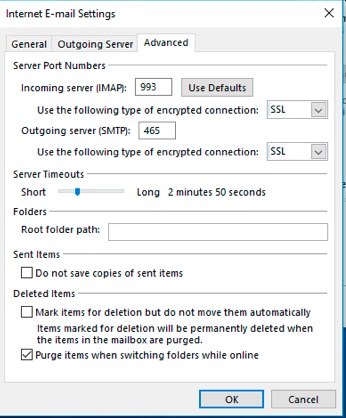
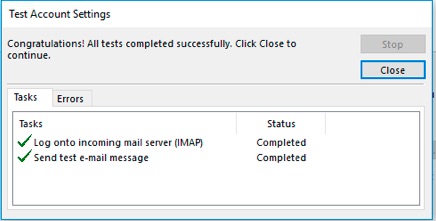
Select SSL type of encrypted connection for both the Incoming and Outgoing server and manually set the Outgoing server port number to 465 . Then click OK . Outlook will then test the account settings.
When the tests are completed, click Close .
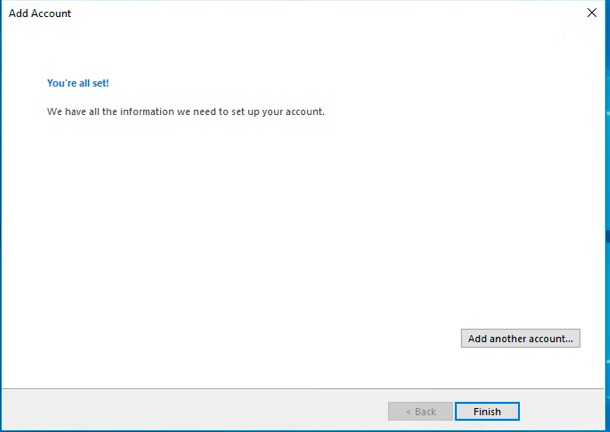
To lock in your settings, click Finish .
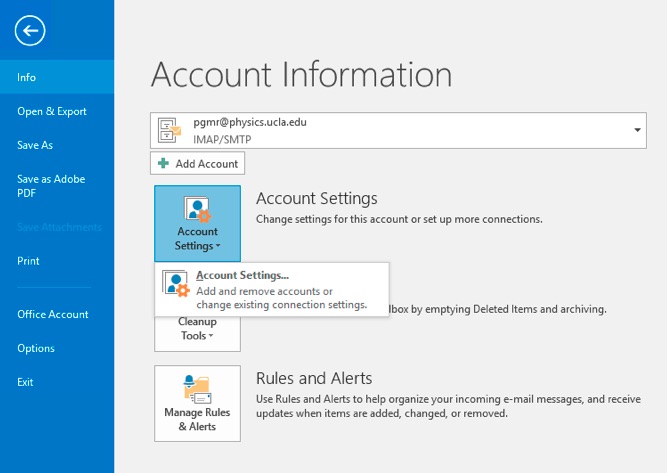
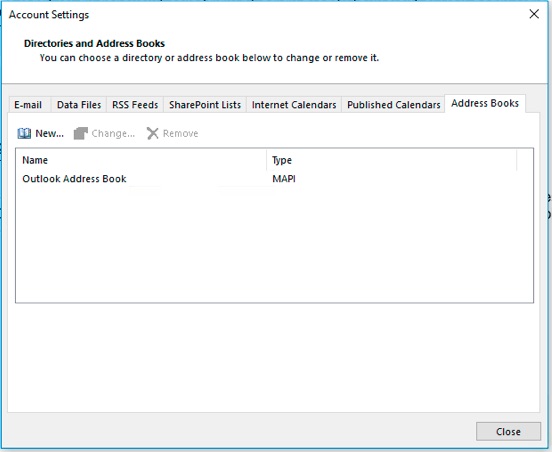
Optional: Set-up to use Campus Directory LDAP server as additonal address book. Click File and select Account Settings.
Select Address Books tab.
Click New...
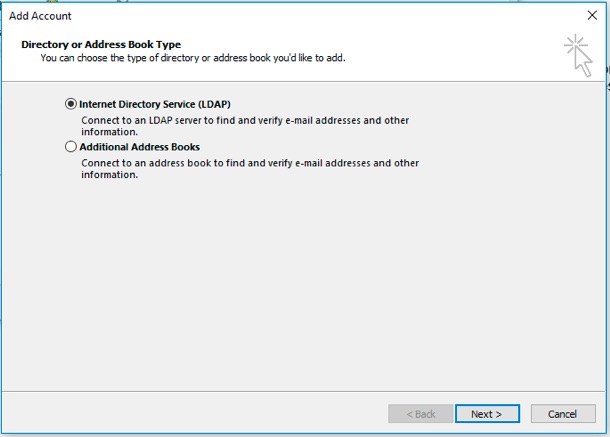
Select •Internet Directory Service (LDAP) and click Next > .
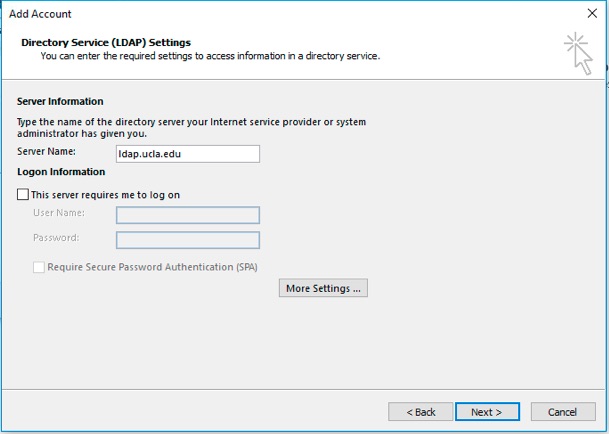
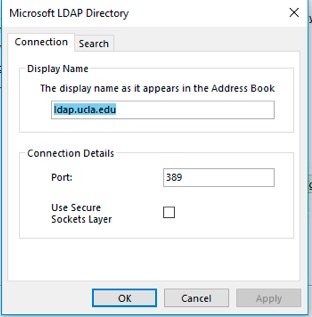
For Server Name enter ldap.ucla.edu . Then click More Settings ...
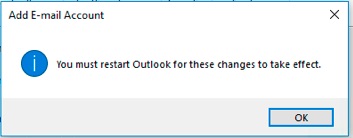
You will be reminded to restart Outlook for this address book. Click OK to continue.
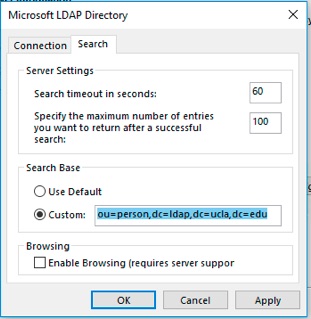
Select the Search tab ...
In the Search Base section, select •Custom: , enter ou=person,dc=ldap,dc=ucla,dc=edu , and click OK .
Click Close , exit and restart Outlook.
Having trouble understanding this page in English? Click the menu above to select your preferred language instead.
New to Physics & Astronomy? Read our introductory guide to Computing and IT Support
To configure MFA (multi-factor authentication) on your smart phone, tablet, or other device, please follow these instructions from UCLA IT Services